Somewhere in the webs of my mind I seem to recall owning one at some point. Perhaps it got donated with some other unwanted items. Funny how things go in cycles. But it seems along with bell bottoms and tie dye, polaroids are making a comeback! You can now find them at Photojojo.
Luckily for me there's some pretty nifty technology that makes polaroids possible on my mommy budget. If you are interested in learning how to have your own polaroid prints for next to nothing, read on.
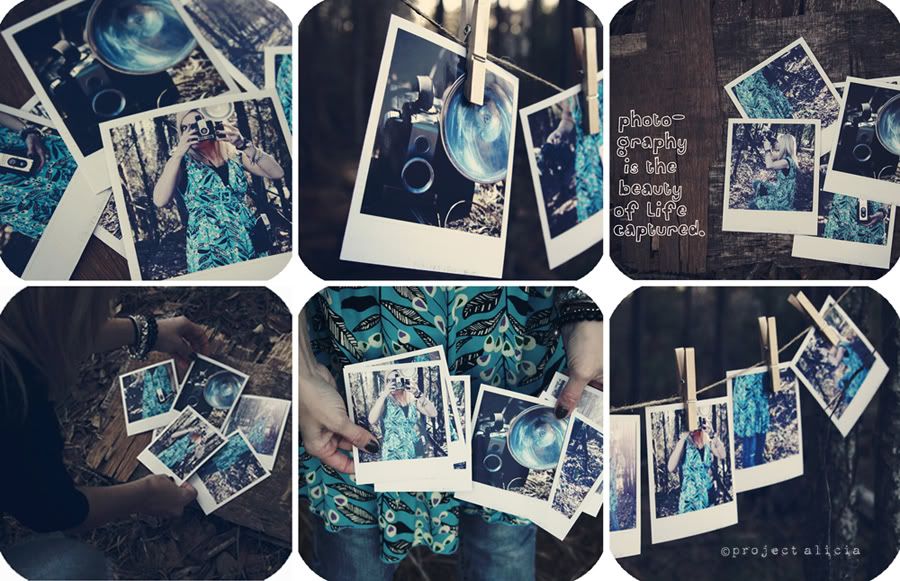
You may remember these photos from Passion Week from the Poetic Winter Challenge. This is when I first put my "fake polaroid" vision to practice...
 I remembered the free polaroids from fuzzimo I'd pinned to my freebies board. I was stoked! This meant I didn't have to make them myself!
If you know how to make your own polaroids, by all means, don't let me stop you. They may look something like this...
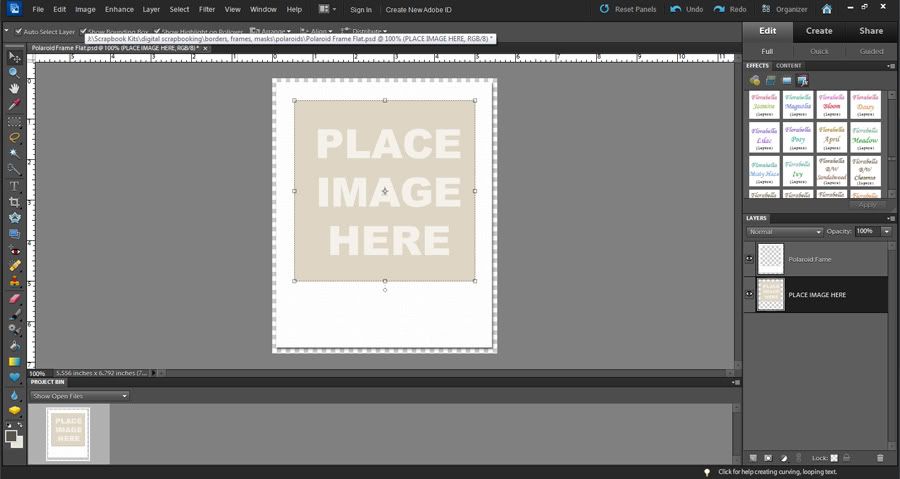
You can go here for more instruction on that method. I, myself, am always looking for shortcuts to make things easier.
And quite frankly, I really love this distressed look that fuzzimo created with their polaroids...
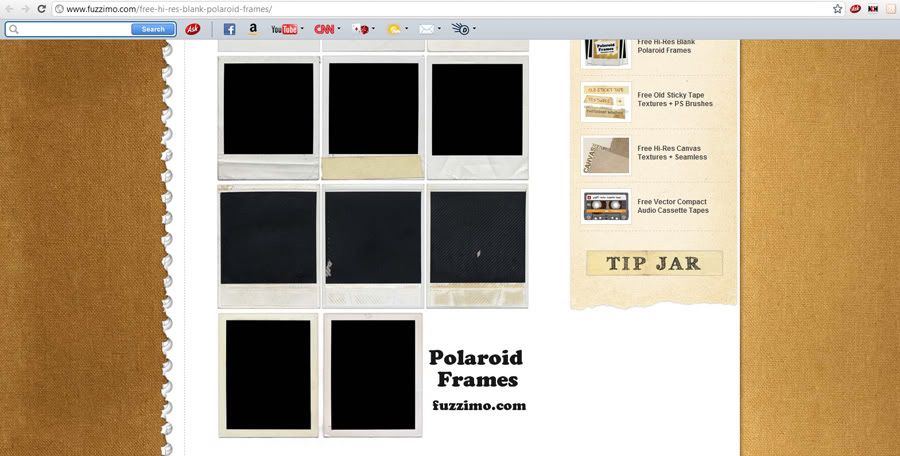
Unfortunately when I downloaded these, they were jpg files so I wasn't sure how to clip the photos. (You need to have png or psd files to have multiple usable layers.)
If you are only going to take pictures of these polaroids, they certainly don't need to be perfect. You could simply crop your photos and drag them right on top of the polaroid. Just make sure to cover as much of the black portion as possible. You can see an example of this here.
Another method would be creating your own clipping mask on the polaroid to only a portion of the JPG. So, I've created a simple step by step tutorial in an attempt to make this process easier for you.
Tutorial: Create a Clipping Mask in Photoshop Elements
1. Open your polaroid and duplicate the image. Click Layer > Duplicate Layer > Name your layer and press ok (shortcut is Ctrl + J). Use your rectangular marquee tool and draw a square around the black portion of your polaroid until blinking dotted lines surround it. Try to draw just to the outside of the black box to ensure that all of the black is included in the mask.
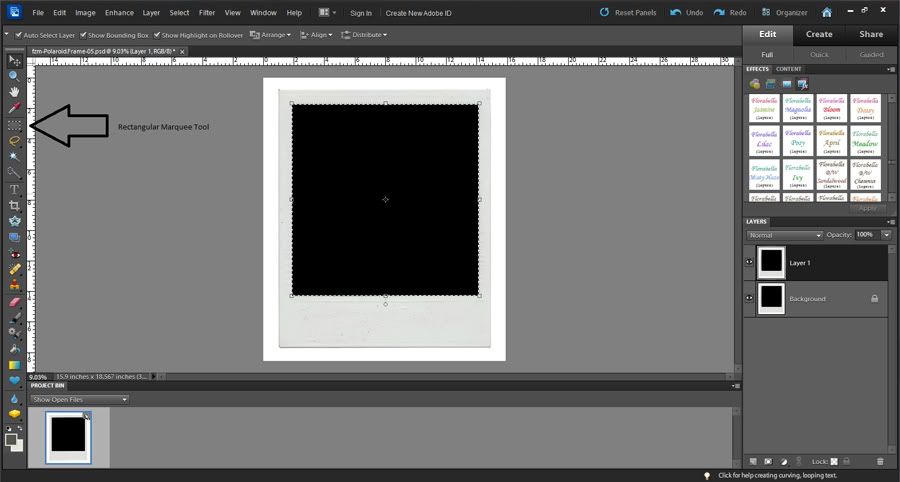
2. Now click on the Add Layer Mask Icon, located on the bottom right of the screen. (This should be available in Photoshop Elements 8 or newer.) You will notice the clipping mask in your duplicated layer.
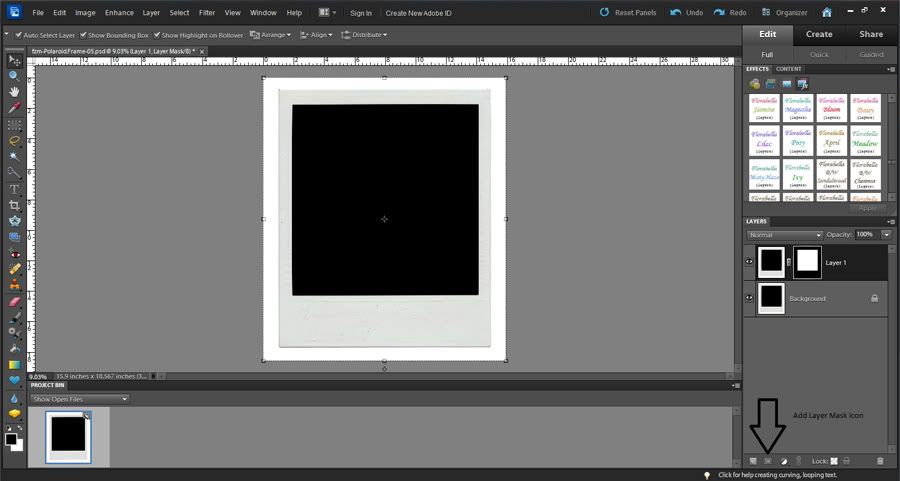
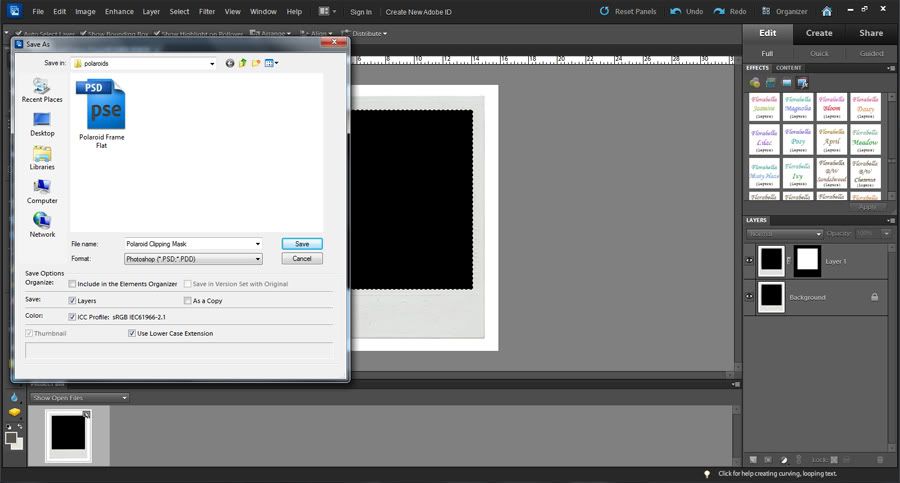
3. Name the file and save it as a PSD file so you can use it again and again. This will save you time later.
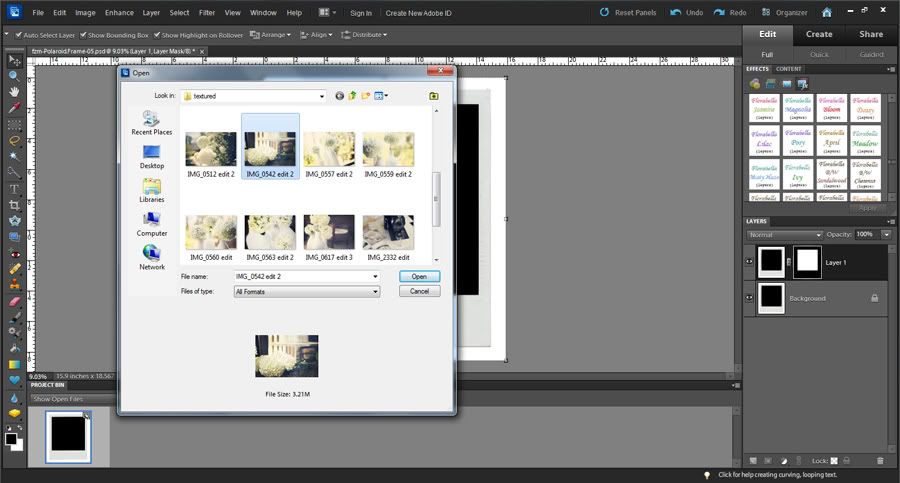
4. Open the photo you want to clip into the polaroid.
5. Grab the photo with your mouse and stretch it so that it covers the clipping mask.
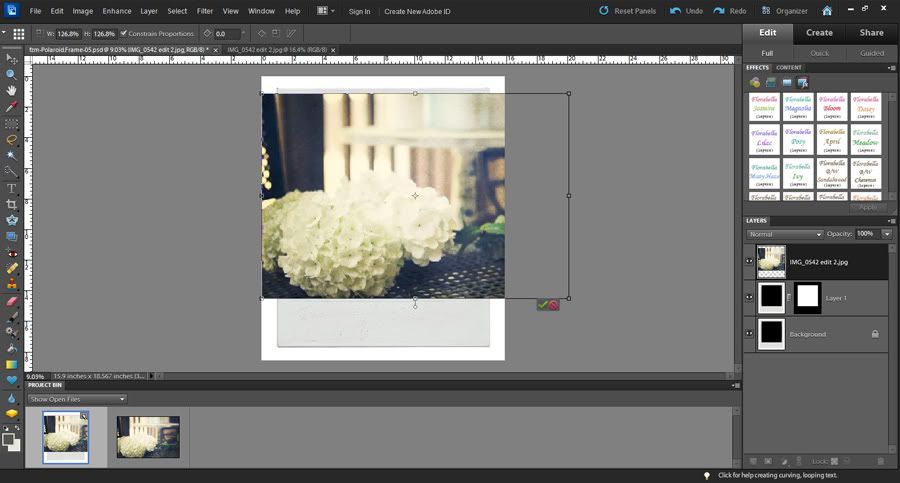
6. Select Layer > Create Clipping Mask and it will take on the shape of the mask (shortcut is Ctrl + G). OR make sure your image is directly above the clipping mask in the layers panel and click Alt as you tap the left side of the mouse simultaneously between the photo and the clipping mask.
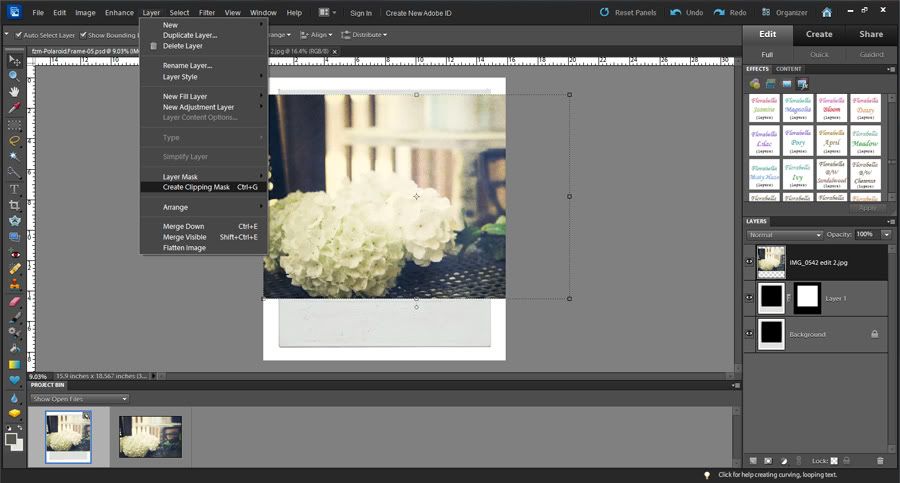
7. Once you have the photo inside the polaroid you can flatten the image. Select Layer > Flatten Image (shortcut is Ctrl + Shift + E). Then you can crop the polaroid to the desired size.
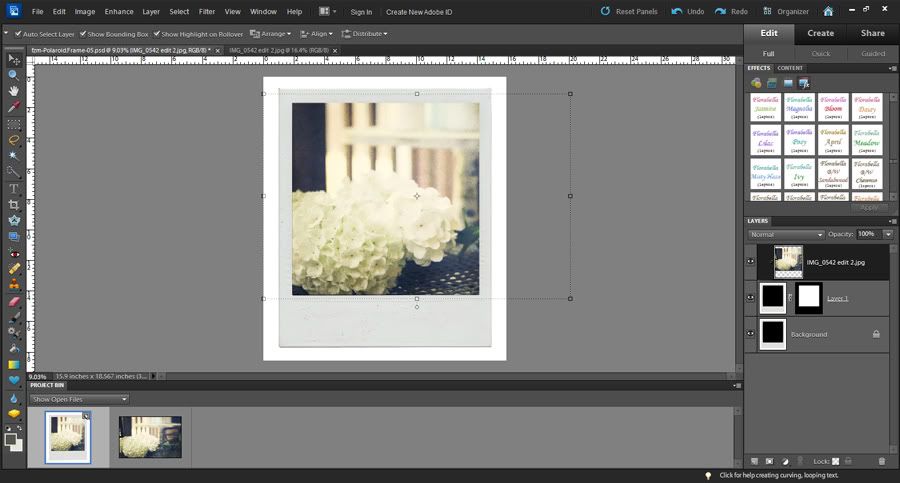
8. Repeat this process 4 times and then drag each flattened image to an 8.5x11 canvas. (To make a new canvas click File > New > Blank File and then choose the sizes that you want. You will want your resolution to be 200-300 pixels/inch for a decent quality photo.)
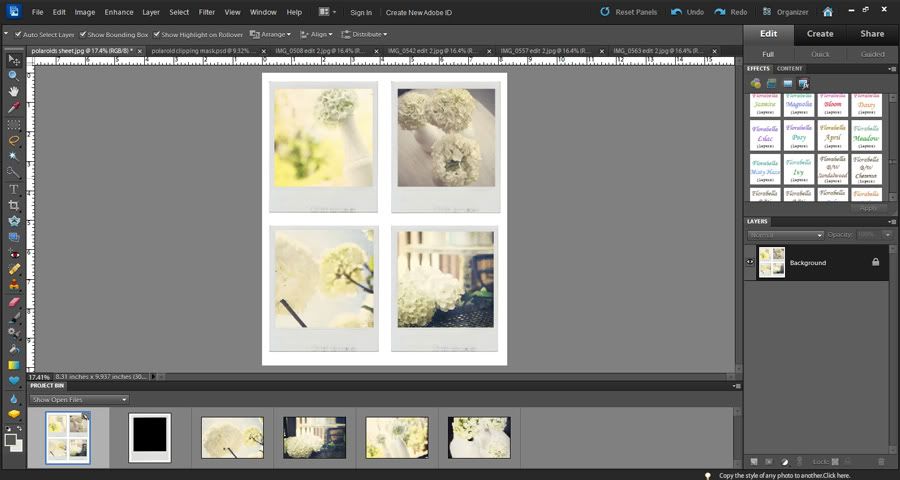 9. Print your sheet of 4 polaroids on photo paper. (I used my cheap canon printer in the comfort of my home, but there are many reasonable print shops these days online or locally if you don't own a printer. You really don't need high quality for this project.) Cut them out and they're ready for your photo shoot.
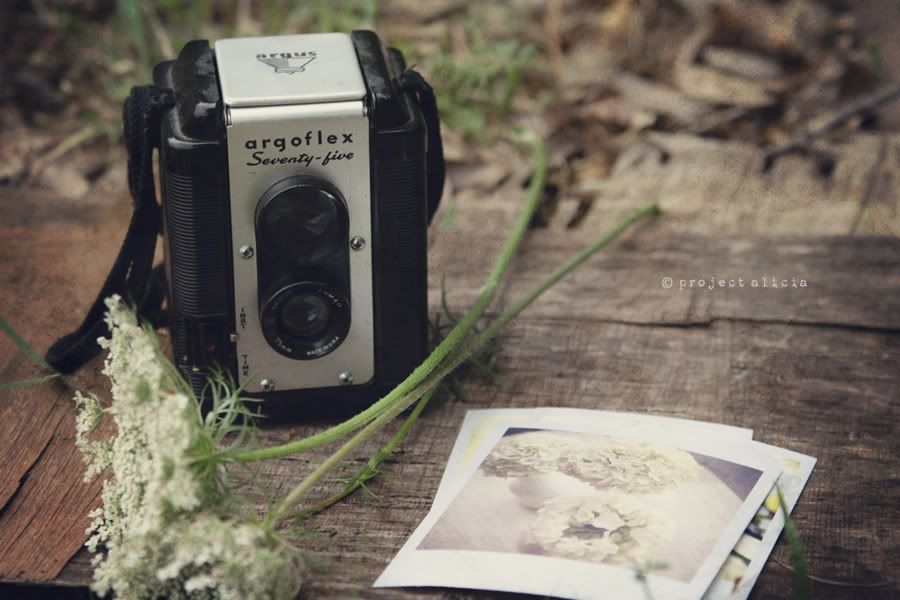
10. Arrange them wherever you want for your shoot. A clothesline or stack is nice visually in photos. Add some props with them. Get creative.
 Leap Into Spring Challenge: Blossoms/Trees
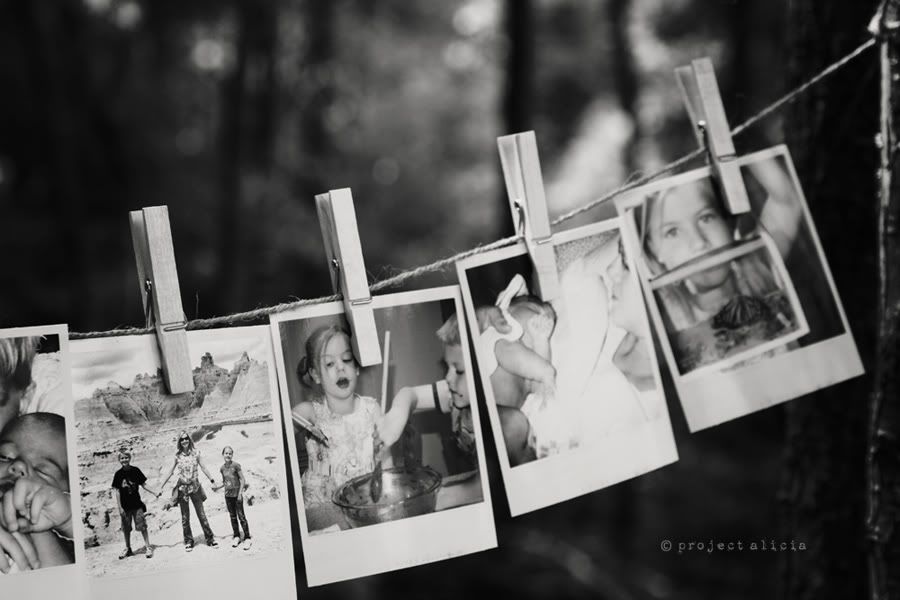 Finding "Me Time"
The best part is that you can tweak the color before, during, or after printing. Once you have printed and shot your polaroids you can edit them even more to give them a more vintage effect with actions or texture. The more vintage, the better. You can find a side by side comparison of my favorite vintage actions here. The Finding "Me Time" photo was originally shot in color and then later changed to b&w. There is no wrong here. Just go with it.
----------------------------------
Combining PhotosAnother fun "fake polaroid" idea is combining photos. For this one I actually printed a polaroid frame and then cut out the center.
I shot a couple different photos, one of just the frame and one of the tree I wanted inside the frame. I then cropped the tree to a square and dragged it inside the frame of the first photo. I enlarged it and did some fine cloning work to reshape the edges of the frame. I'm sure there are many other more advanced, technical ways to get this shot or to create this effect, but this worked just fine for my purposes.
--------------------------------
These easy, inexpensive polaroids are a fun way to change up a normal shoot and enhance any photo, post, header, collage, or pretty much anything you can dream up. Once you figure it out, go join the Fake Polaroid Fun on Flickr.
Not Enough?
Here's a few other ways to "fake polaroids"...
Make a Polaroid in Photoshop
Use the Polaroid Generator
135 Free Polaroids from Sweetly Scrapped
Try The CoffeeShop Polaroid Effect Action
Download the Poladroid Polaroid App
ShakeItPhoto Polaroid App for Iphones
DIY Paper Polaroid Frames
There are so many different ways to make polaroids. I am by no means any kind of expert, but I hope this gets your creative juices flowing. The sky's the limit!
Other posts you may like:
Using Actions and Textures to Achieve a Vintage Flair for your Photos
Vintage Actions: A Side by Side Comparison & Tutorial

Awesome tutorial, Lish! Pinned, tweeted and shared on FB. Have a great day! :)
ReplyDeleteThanks girl! I owe ya! ;)
DeleteNow how in the WORLD did you figure that out??!! You're a flippin' genius! Would have never got the duplicate layer, rectangle marquee + layer mask thing. I'm doing mine in PS now! You're awesome! Thank you so much for taking the time to share! xoxo
ReplyDeleteKarli, I actually figured the marquee and layer mask thingy out by accident. lol. Sometimes that's the best way to learn. Loved your polaroid photo on instagram!
DeleteI loved that idea to compine photos - I'll try it sometime!!! :) Thanks!!
ReplyDeleteAnd by the way, I use Photoscape (it's free) and there are few nice polaroid frames!!! ;)
Thanks Pieni for the heads up! Nice to know. I also use photoscape, but haven't in some time.
DeleteAny tips on printing them to get the best polaroid-like look?
ReplyDeleteDasha, I'm no expert on the printing, but as far as I can tell it would seem that the cheap printers are great for this project. Maybe better? lol. The more vintage the better. (And some cheaper printers don't give you the sharpest colors.) You can also apply a vintage action prior to printing- this may also help with a "polaroid-like" look. You can find my side by side comparison of some of my favs here> http://www.projectalicia.com/2012/01/which-vintage-action-side-by-side.html
DeleteThanks. :)
DeleteLove this...especially the combined one with the tree! I've also got a bloggy friend who does a great tutorial on making a photo board of Polaroid photos here: http://www.flickr.com/photos/27761519@N07/6027819168/. I've got one up in the kitchen and it gets so many comments and great since I can just update a few pics each year http://3.bp.blogspot.com/_A2MUftSDYw0/TFPkre5QwwI/AAAAAAAAIkQ/OdfMTXROsF4/s1600/IMG_3656.JPG. Come to think of it, it might almost be time again for a refresh! xx
ReplyDeleteVery cool! Thanks for sharing these, Meghan! I'll have to start a polaroid pinterest board! ;)
DeleteOooo this looks awesome!
ReplyDeleteDude. You are SO smart!
ReplyDeleteI am totally going to try this what a fab way to change things up a little ;)
ReplyDeleteThis is awesome! I love the combining of the photos!
ReplyDeleteAnyone that has Photoshop can also use this Polaroid Photoshop Action to create the effect easily.
ReplyDeleteCheers and happy Photoshopping!
What dimensions do I want to use when I want an actual physical copy of these polaroids? Because I did it at Walgreens (4x6) and it cropped my white border of the polaroid-like photo off.
ReplyDeleteThanks!
Hannah, do you use an editing program? The actual size of these polaroids from fuzzimo.com are a strange size- and very large. When I open it in photoshop I resize it to 4 inches wide. If you constrain proportions it's 4 wide by 4.671 high. (This is with the small white trim around it that it comes with from their website). I would think that you should be able to print it as a 4x6 anywhere (just make sure you don't auto fit the space if you have that option). Once they're printed you can crop the edges and have a fun sized polaroid. I actually put four on an 8.5 x 11 sheet and print it at home. I'm not sure it's cost advantageous to do this at a print shop, but it could certainly be done as well. This method is using the pre-made polaroids. You could certainly design your own polaroids and customize them to any size you'd like. Click on this link to see a video tutorial--> http://www.youtube.com/watch?hl=en-GB&v=9q8QehaqrCQ&gl=NG. I hope this helps.
ReplyDeleteThis tutorial was very helpful! Although I was wondering what size I should print them in order to avoid anything getting unintentionally cut off. I use a local photo kiosk at Target.
ReplyDeletewhat type of paper material is it that you used to print it in ? THank you :)
ReplyDeleteAwesome!!
ReplyDeletethank you so much for the tutorial I love it, I was looking for this Polaroid tutorials or frames for my Smash Book and now, thanks to your lovely explanation I will be able to not only print the frames, but also now I know how to create layers and combine pictures to create the effect ... so thank you bunches!!! :D
ReplyDeleteIf youre looking to use Photoshop to turn photos into polaroids (polaroid frame around photo), check out this quick Photoshop Action: Polaroid Photoshop Action
ReplyDeleteCan i ask a question, how do you put those 4 pictures to get the same size? Because i try to adjust it one by one but the width and the height still not the same to each other. I can't use auto align layer as well. Well this is my first experience using photoshop. I hope you can answer this. Thank you! :)
ReplyDeleteWish you could turn your Instagram photos into polaroids using Photoshop?
ReplyDeleteI made a tutorial that will have them print ready in less than 5 minutes by utilizing Photoshop Action files! Check out: how to make an Instagram Polaroid
Cheers and happy Photoshopping!!
I don't know what I'm doing wrong but the picture i want to clip or whatever always gets deformed because simply. I can't figure how to do this. I always end up having to reshape the picture instead of however this is suppose to go. I got really frustrated. SOMEONE PLEASE HELP.
ReplyDeleteSo cool! Thank you for this awesome tutorial, I was exactly looking for some ways to make my instagram edited photos into polaroids cause there's no way I can get the fujifilm instax share in my country without spending a lot of money. Just LOVE IT!
ReplyDeleteHi Alicia,
ReplyDeleteI want to make some fake polaroid with your steps. And i found that in my Photohop CS6 is not allowing to Open the frames that you conviced. What should I do to make Photoshop be able to open Duplicate Layer for frames?
Another good editing thing on a computer is piscart, it should work pretty well for this.
ReplyDeleteIf some one needs expert view about blogging after that i
ReplyDeleterecommend him/her to pay a quick visit this web site,
Keep up the fastidious work.