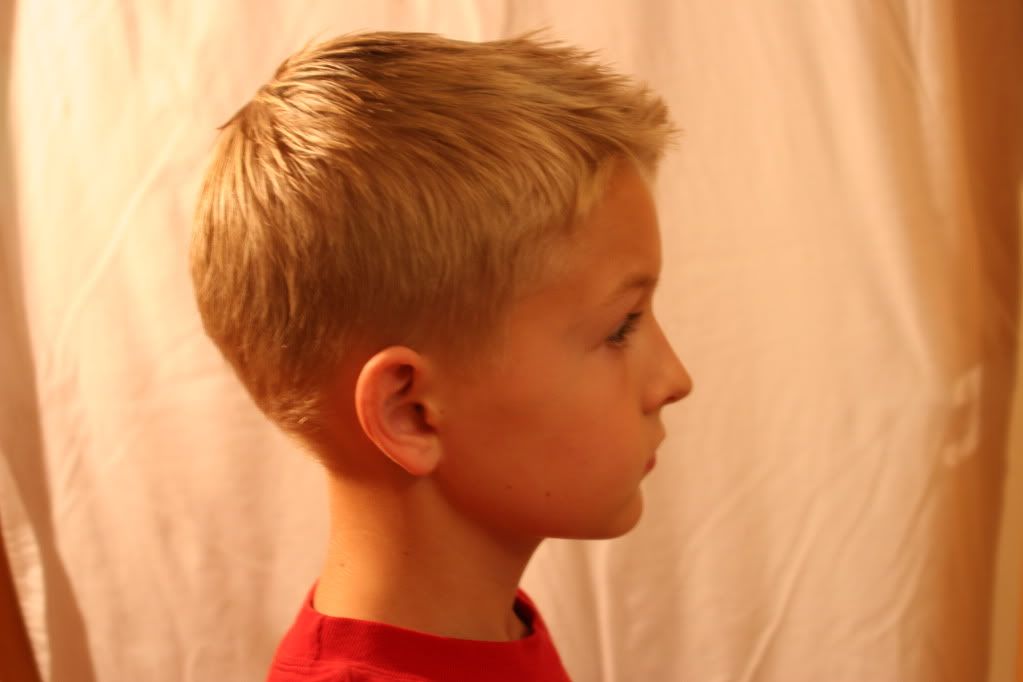
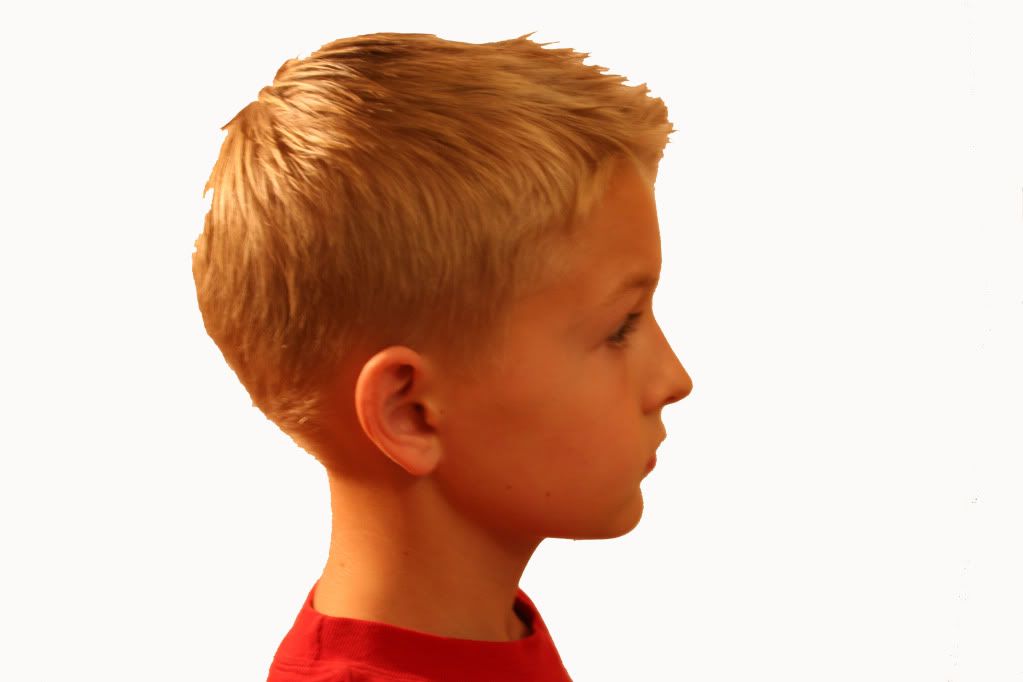
 I'm participating in Pixel Perfect's Before & After meme again. I had so much fun last week I decided to try it again. There are some amazing photoshop wizards out there.
This tutorial is from Alison at Home is Where the Heart Is. When I was just starting my Project 365 last year she was very inspirational. She is a mother of 6 children and is a super talented lady.
I did silouettes of both my kiddos and I like Little Man's slightly better.
1. Photograph your subject, in profile, with a digital camera. Your camera should be on the same level as your subject. Try to shoot against a pure white background: this makes it easier to digitally remove the background later on. Hang a white sheet and used some lights behind. (The beauty of it is that it doesn't have to be perfect. I didn't have a big enough sheet and had crappy lighting. And now I'm exposing my flawed photos for the world to see.)

(I whitened the background to make it easier. Not a required step.)

2. Open your photo in Photoshop. With the Magic Wand tool, select the (preferably white) background for removal. Once clicked, the background will be outlined and highlighted, go to 'edit,' and select 'cut.' The background will disappear.
3. Go to 'image,' and select 'adjustments.' Select 'desaturate:' this removes all color. Also in 'adjustments,' select 'brightness/contrast.' Both lower the brightness, and increase the contrast: your image will take on the form of a silhouette. If your picture hasn't fully silhouetted, fill in the rest of the figure with black, or another color, using the Paintbucket tool.
4. Use the brush tool to shape the shoulder area. Use the magic wand tool to select the silhouette.
5. Then cut and copy it into new canvas and add some text!
If you have them done professionally they are quite pricey. You can see her final work here and here. They are stunning!
Definitely worth a try if you have photoshop!
That's really cool! What a lovely profile he has, too :)
ReplyDeleteThat is so cool! I remember when I was a kid having one done but my profile was drawn from a shadow and cut out on black construction paper. Now look at technology- wow!
ReplyDeleteWhat an awesome idea. I love what she did with hers. I for sure need to put this one in the memory bank for later.
ReplyDeleteyou are oh so kind! i'm glad you enjoyed this little project - isn't his little profils so sweet! I love how it turned out:)
ReplyDeleteneat. Still wishing I had a digital SLR...sigh.
ReplyDeleteLove the tutorial! Nice!
ReplyDeleteWow! I will definitely have to try this!
ReplyDeleteCheck out The Way I See Things for two new awards for you :-) (you might like these better than the last one!)
Dawn
http://www.thewayiseethings.typepad.com/blog/2010/06/-winner-winner-chicken-dinner.html
Very cool! I love how it turned out!
ReplyDeleteWOW great tutorial, Lish! Will have to give it a try *if I can get my little monkey to stand/sit still long enough to take his picture* I love PhotoShop and can't live without them hahaha. Thanks for sharing this!
ReplyDeleteLuv this! Where will you hang it?
ReplyDeleteI gotta try this now. =)
cool! thanks for the tutorial
ReplyDeleteSo cool!! Thanks for the tutorial...guess what I am going to do this afternoon...try it out!!!!
ReplyDeleteThis is great - I've been wanting to do this with my girls but just haven't gotten around to it. This is easy and a good reminder. Thanks!
ReplyDeleteLOVE THIS!
ReplyDeleteThose are AMAZING!!! You are so talented!
ReplyDeleteHoly Man! I am SO doing this! What a great idea!! And your kid is just adorable:)
ReplyDeleteThis is cool! I wish I would have done this when my kids were growing up.
ReplyDeleteHe is a very good looking little guy with a very talented mama! One of these days I am going to splurge and buy photoshop! Need a new computer first though!
ReplyDeleteWow, I know what I'm doing for Father's Day, now!
ReplyDeleteI am so excited!! I have always wanted to know how this is done. Thank you!
ReplyDeleteThis is so fantastic. THANK you so much for the tutorial!
ReplyDeleteI absolutely LOVE this! And I checked out Alison's and her's are great too! I so want to do this! I must get Photoshop! LOVE This! Love it! Ok that was a lot of love and exclamation marks but I really love this! :P
ReplyDeleteVery cool tip. I'm gonna have to do one of these for each of my girls. Love it.
ReplyDeleteSaving this to my bucket list of one day...maybe I will get around to photoshop, get more up to date with the photography thing on my grandkids...
ReplyDeleteEnjoyed
Janette
awesome - photoshop allows you to do so much...
ReplyDeletePS. I did that post about social media yesterday, so take a look at it whenever you get a chance...tell me what you think...
XOXOX
Kiki
nice one! i need to get me some photoshop lessons. thanks for this one. :)
ReplyDelete~ash's mum
Thanks so much for the tutorial. I've always wanted to try one of these!! Bless you! ;)
ReplyDeleteI like that a lot! Thanks for the tutorial!
ReplyDeleteOh wow! Totally awesome!
ReplyDeleteThat's awesome! I'm going to have to try that!
ReplyDeleteThats awesome! i'll have to try it!
ReplyDeleteThat is pretty amazing! I am so deficient when it comes to photo software, and you make it loo so easy!
ReplyDeleteThis is such a great idea! It looks so easy too. I'll have to give this a try with my ancient version of Photoshop! ;)
ReplyDeleteCool! I will have to try it! I have an award for you when you have time!
ReplyDeleteWhat a fun idea, I've never thought of trying that.
ReplyDeletethat is so, super duper FUN! LOVE it!
ReplyDeleteSweet! Thanks for sharing, I'm giving this a try.
ReplyDeleteThat's incredible - I'll have to save for later so I can try it myself. Thanks for stopping by to visit. New follower!
ReplyDeleteI tagged you for the beautiful blogger award!
ReplyDeleteSo cool! I'm going to try to do this tonight or tomorrow. We had my sons silhouette done when we went to Disneyland...loved it!
ReplyDeleteBTW, added you because we have such great taste in blog names. hahahaha No worries, I didn't steal from you...actually 'stole' from Jason Mraz's song. :P
Awesome tutorial! I will definitely be using this sometime soon.
ReplyDeleteSo, I can't to try this on myself...I want to see if my nose really looks like how my hubs says it does...
ReplyDeleteOkay, you know I suck with the camera, but I think I might actually try to give this a shot! The final work is incredible and I'd love to have one of all three of the kids!
ReplyDeleteThis is fantastic!! I really need to learn how to use my photoshop better - I get so overwhelmed with everything there is to know. I also need to put your blog on my favorites list... I always love visiting!!
ReplyDeleteI like this! I've seen silhouettes in various places and think they look really effective. I'm not a great photographer and don't have photoshop (yet!) but I'm learning. This is something I'd love to try eventually.
ReplyDeleteRobyn, thanks! How can I find you?
ReplyDeleteHow way cool is that?!! Thanks for sharing.
ReplyDeleteI'd like to try that one day. What a great way to capture their innocence.
ReplyDeleteGreat tutorial! I'm gonna have to try that out.
ReplyDeleteHalf Past A Freckle
So cool! I remember doing profile pictures in elementary school...way back in the day!
ReplyDeleteOMG! u have done a great job. I def need to know more bout ediitng,
ReplyDeleteBtw, i have joined in too
plz do viist
Wow, that is amazing...Thanks for the tutorial. I am going to have to try it..just awesome.
ReplyDeleteThis is really neat! I bet they'd look great printed on canvas!
ReplyDeleteI tried doing that by hand (I don't have photoshop). VERY hard! I need to get photoshop!
ReplyDeleteSam
mom undecided
Great tutorial Lish! You're awesome at these. :)
ReplyDeleteHope your first day of summer break goes well with the kids tomorrow. I'll be praying that the brother-sister fights are kept to a minimum. lol Have a great night.
Kristi, Live and Love...Out Loud
@TweetingMama
Awesome! I'm totally bookmarking this and will do it for my daughter when I find the time (and when she gets a little older). Thanks!
ReplyDeleteThanks for "perusing". A bit of a busy mom here but always have time to follow ;) Following both your blogs now.
ReplyDeleteEnjoy your weekend! :)
~~ Kat ~~
My Tots Exactly!
My Tummy Calls
My Game of Chance
From a SAHMmy to a WAHMmy
Fantastic idea!
ReplyDeleteI love this! I'm terrified of photoshop, but this seems doable. Thanks.
ReplyDelete