{Action: A recording of a series of Commands in Photoshop to which you apply a name. Later on, you can play that recording back on a different file and have Photoshop do your work for you. They are mostly used to capture repetitive tasks that are to be applied to a series of files or walk a person through a technique in a step-by-step fashion.}
Actions is just a fancy term that means steps are removed to simplify your life. It is a fabulous addition in the photo editing process.
{Texture: A structure of interwoven fibers or other elements.}
Textures can consist of just about anything including other photos.
You can use textures and actions individually or combine them for endless combinations of results. So, keep your mind open to the possibilities.
If you are interested in achieving a vintage flair, this tutorial might be for you.
Today I am going to walk you through a step by step process so that you can see how incredibly simple it is to transform a photo using actions and textures.
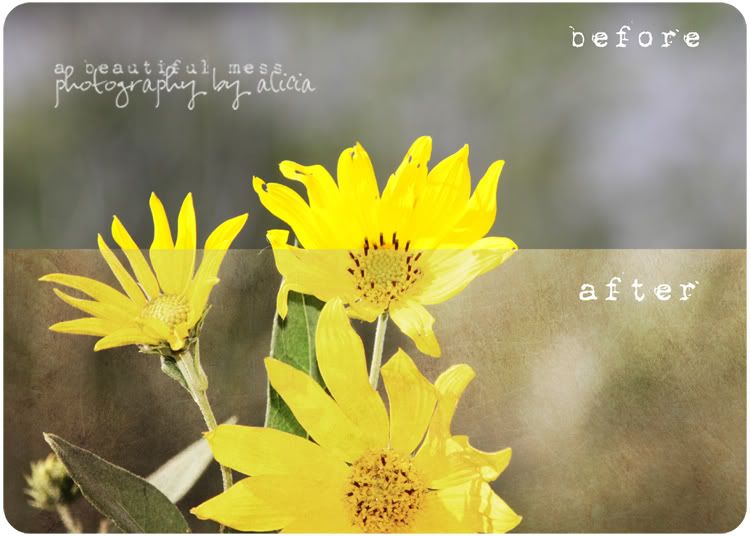
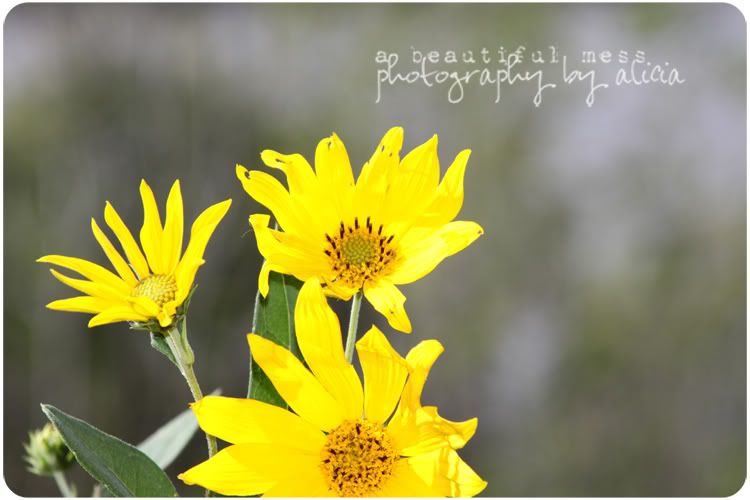
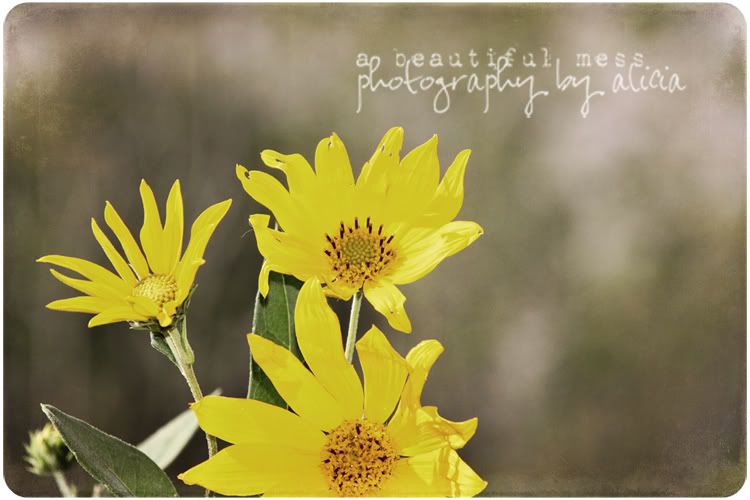
The original photo wasn't too shabby.
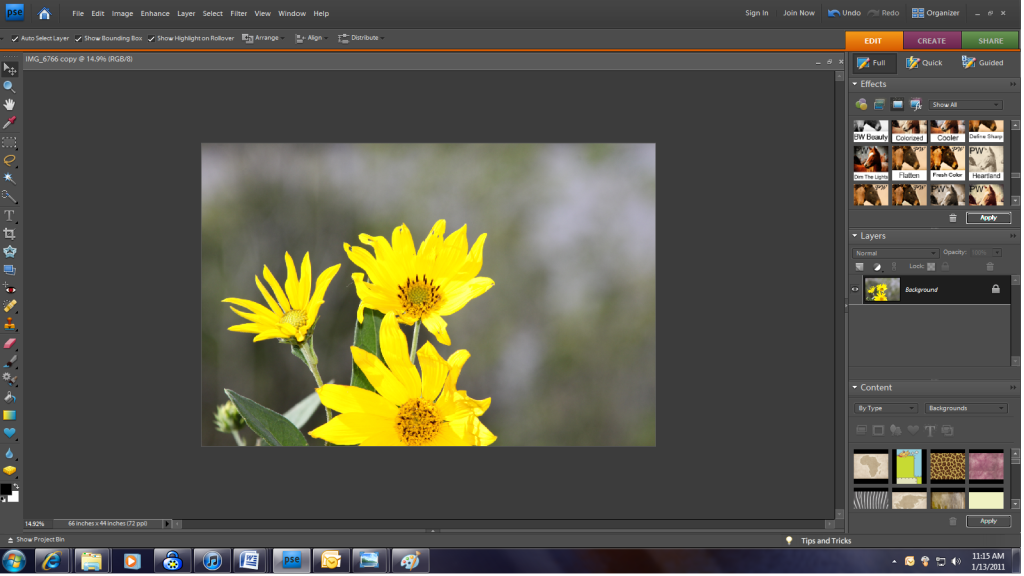
But let's open it up in Photoshop to see what we can do to transform it. (The program I currently use is Adobe Photoshop Elements 7.)
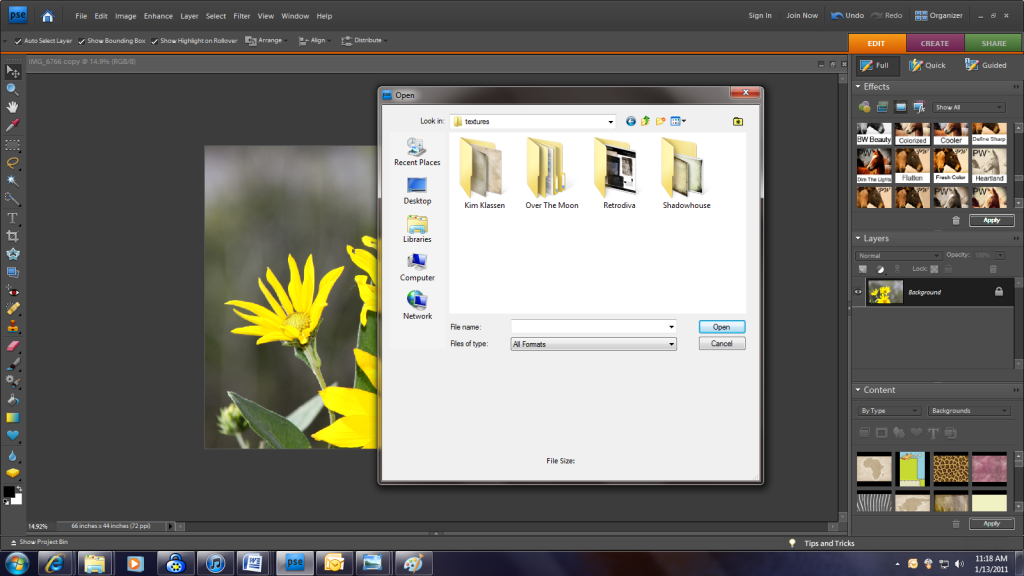
After you have your photo in place, open the folders that house your textures and select the one that you think would work well with your photo.
I chose one by Shadowhouse in his texture set #2 called Hazy Shade of Winter. You can find the downloadable zip file here for the complete set.
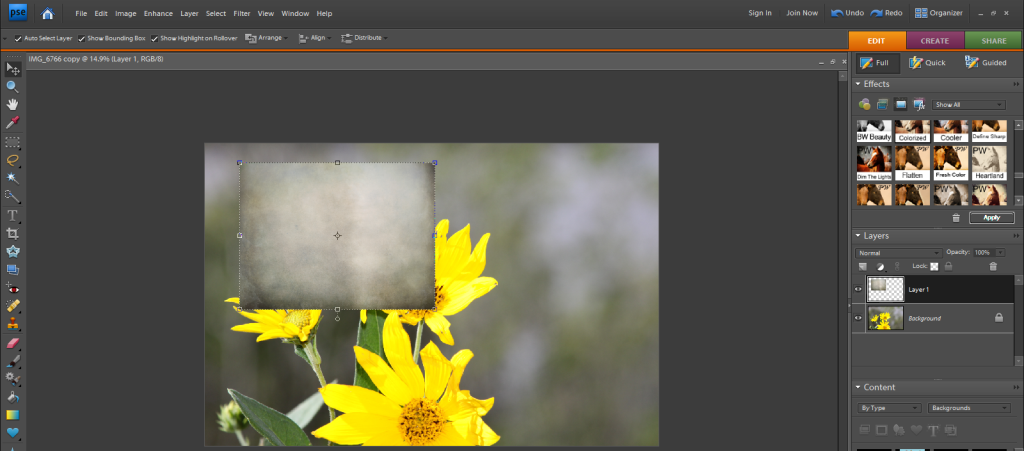
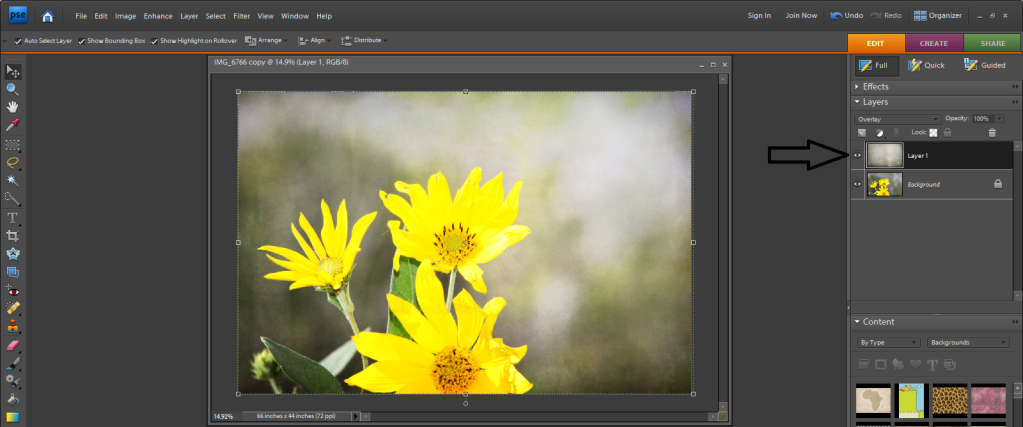
Drop it into place and then using your arrows pull to stretch the texture to your photo size. You will notice that you now have two layers in your layer's palette.
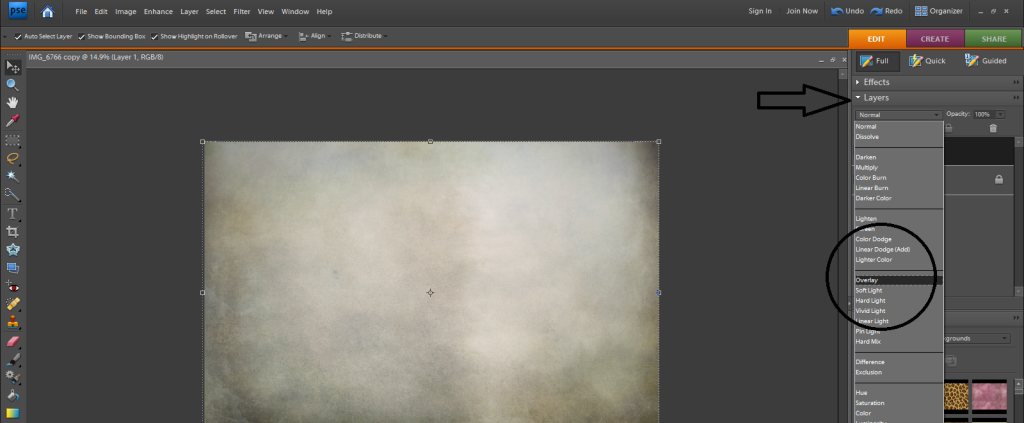
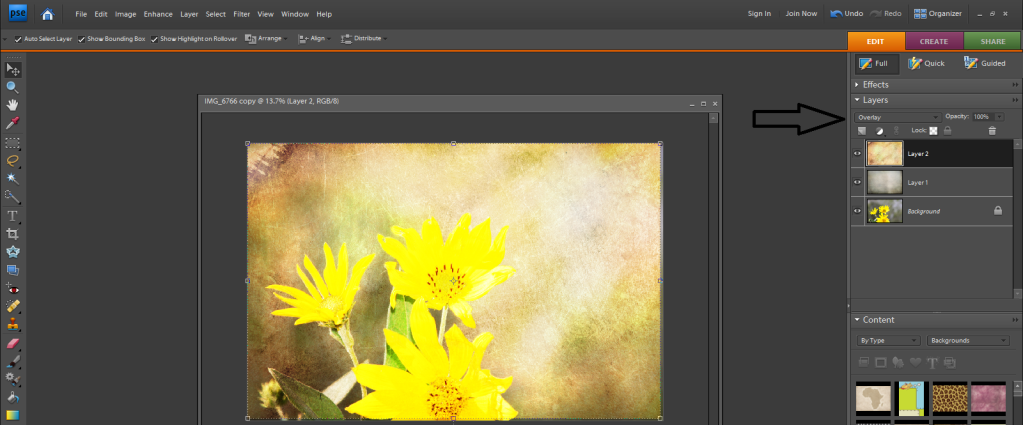
Just under the word layers, you will find a drop down box. Open it up and scroll down until you find overlay.
Click on overlay and you will get something that looks like this.
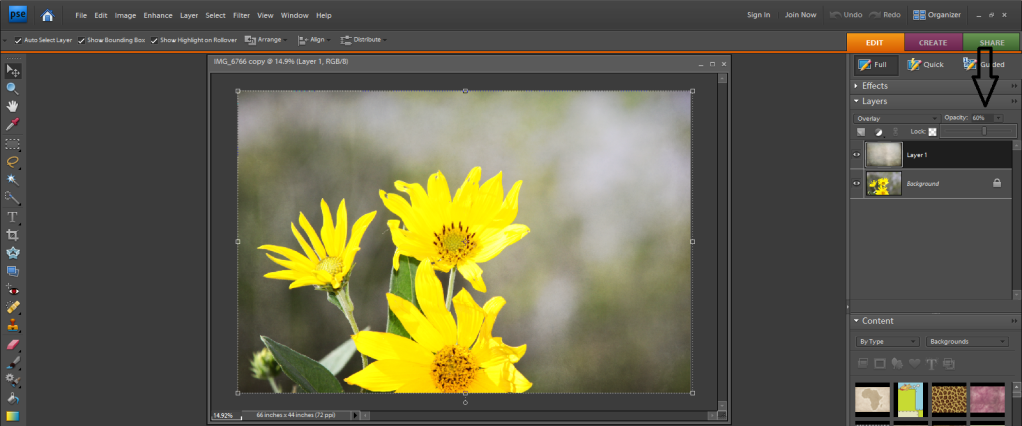
To tone down the brightness I used the opacity tool and changed the number to 60%. Ah. Much better.
At this point you may decide that it looks perfect and you are done. Your finished product would look like this. A lovely photo with a little edge.
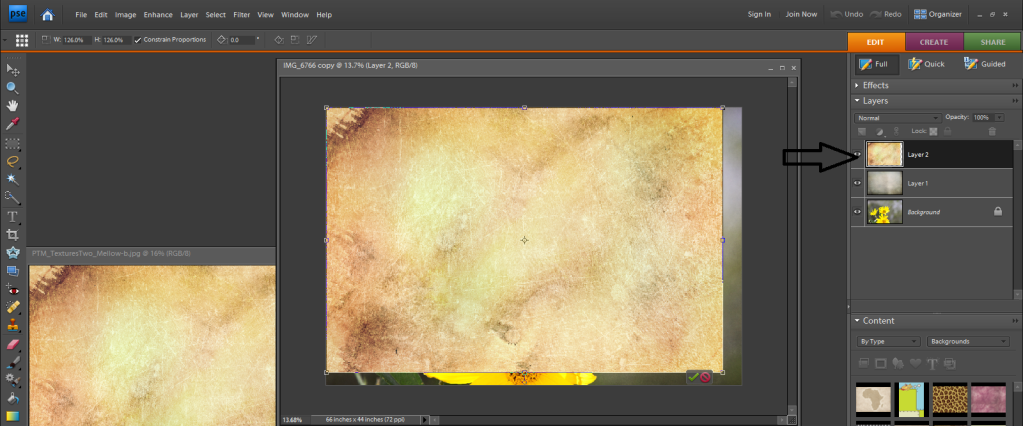
However, I wanted to distress it a bit more, so I decided to go back to my textures and select another one. I found one in my Paint the Moon folder called Textures Two Mellow. It came in a set that I purchased for $35. You can find it here. It had a pop of yellow and a little more grunge to it.
I stretched it to fit and then selected the overlay option just as before, but it was way too strong for my taste.
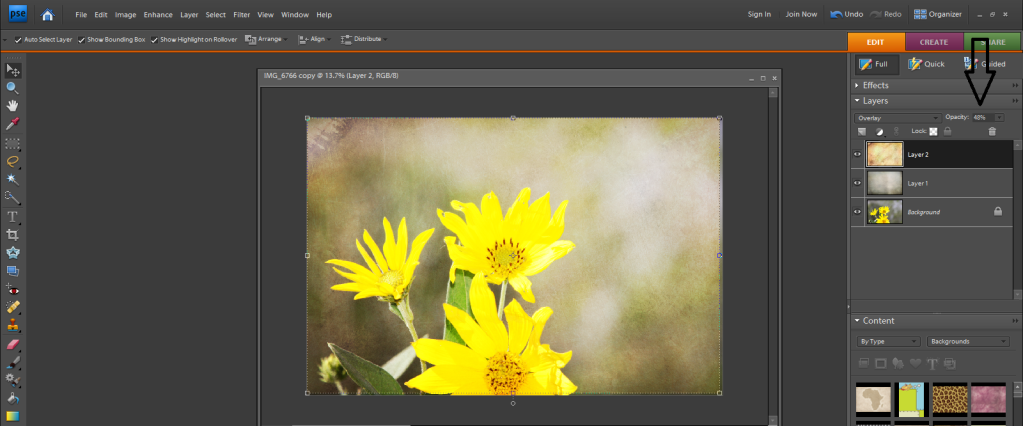
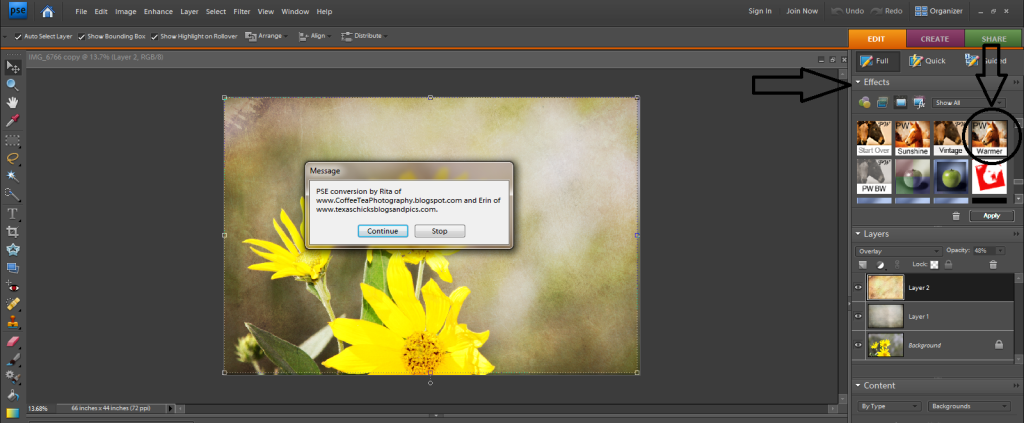
Using the opacity tool once again I toned it down to 48%. It softened the image and was more in the direction of what I was trying to attain.
At this point, you could call it good and you would have a lovely product.
But just for fun I decided to add some actions for some fine tuning. Actions are a must have in your photoshop tools. If you don't yet have them, you are missing out.
Pioneer Woman and Coffeeshop have some of my favorite actions and they are free. You can find more information on actions, including a video tutorial for how to download them, here or here.
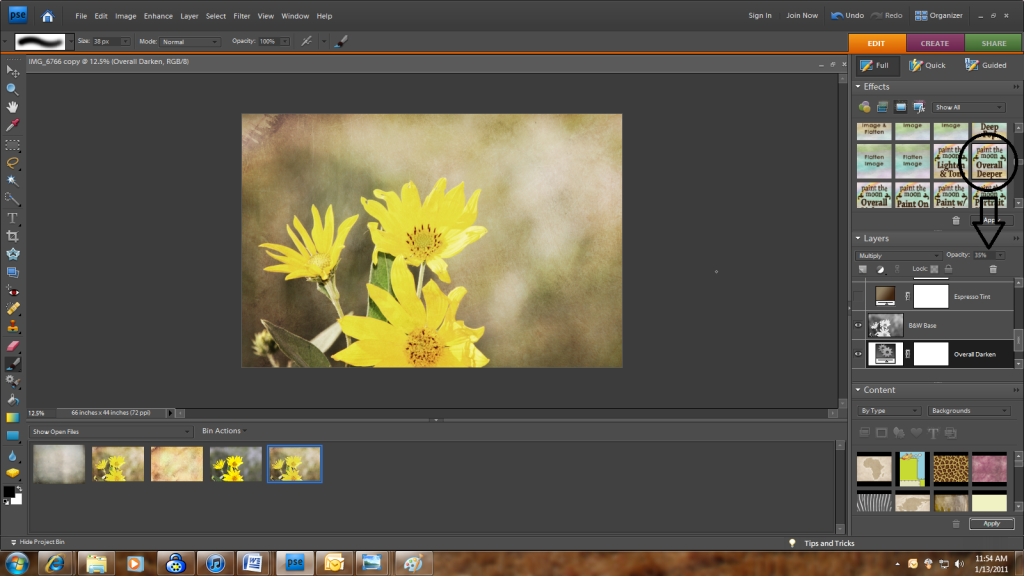
If you click on your effects that is where you will find your actions. I decided to try an action by Pioneer Woman called warmer. If a box pops up just click continue.
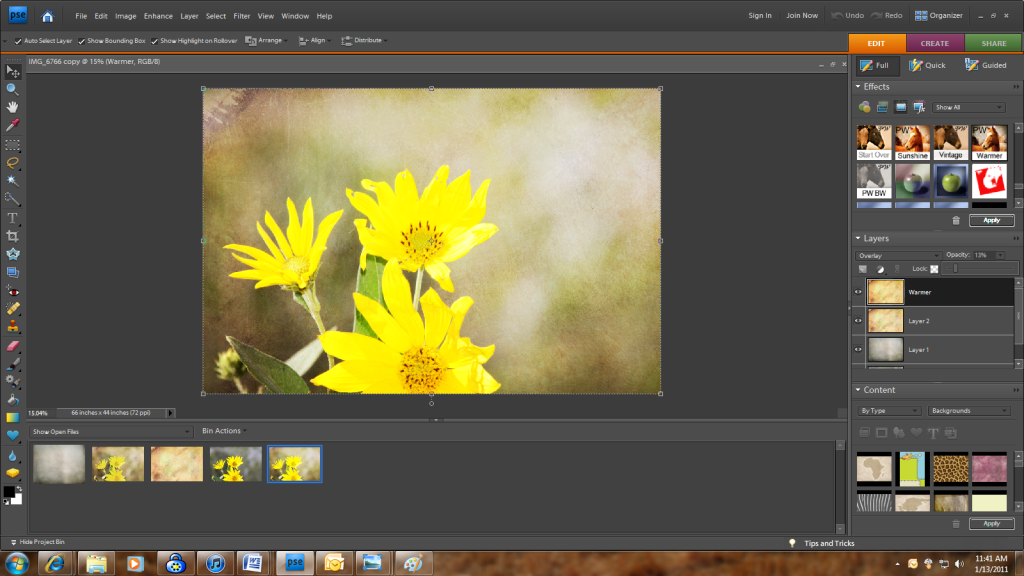
Not sure I am liking the result, so I can either undo what I've done or choose another action. (You can hide the layer as well by clicking on the little eye found on the left side of your layer in your right column.)
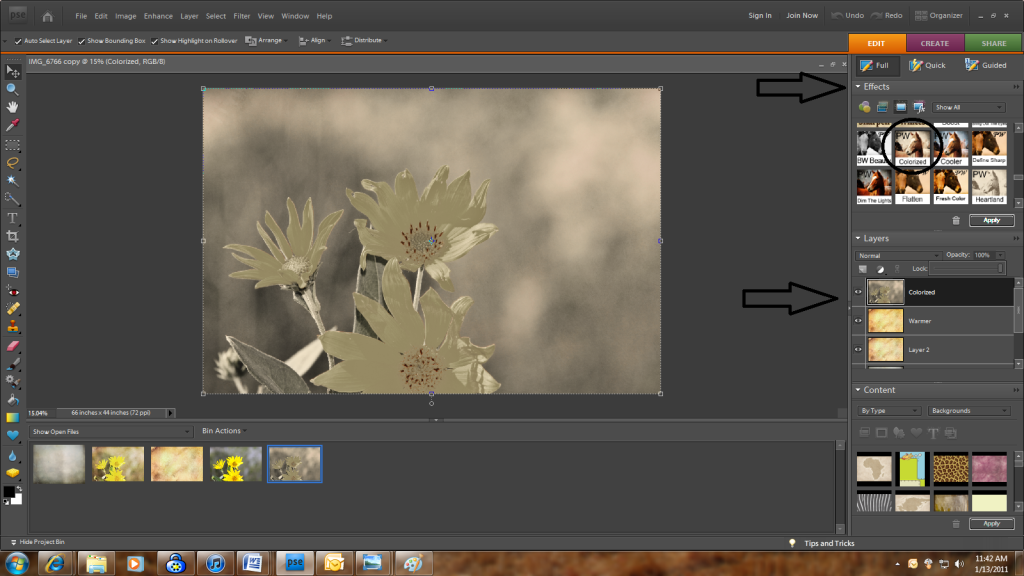
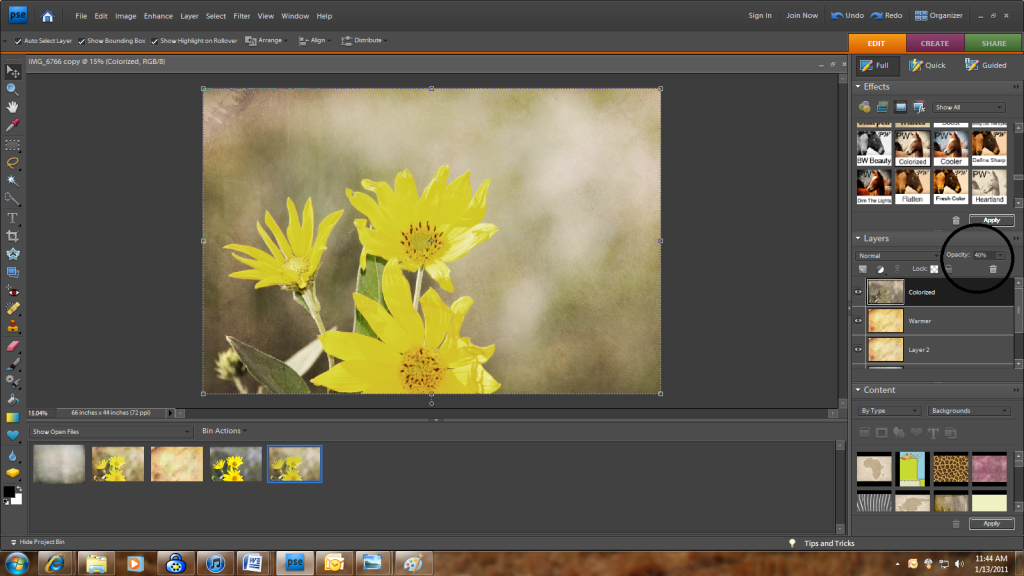
I chose to use another action by Pioneer Woman called colorized. It has been one of my favs.
Then I toned the opacity down to 40%.
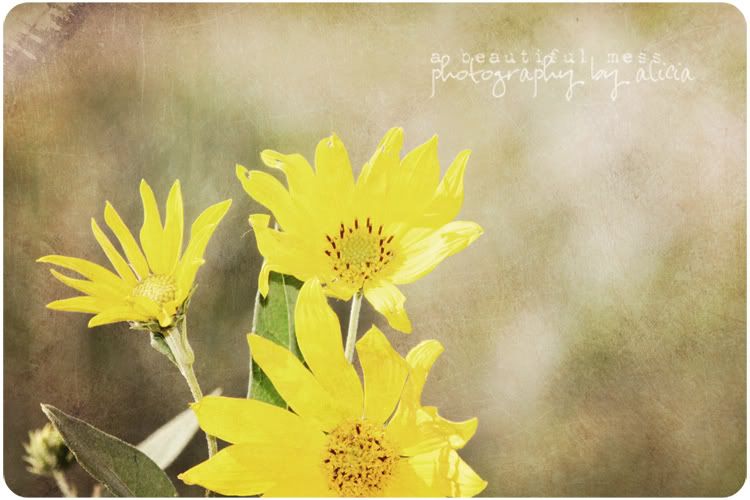
If you stopped now, your image would look something like this.
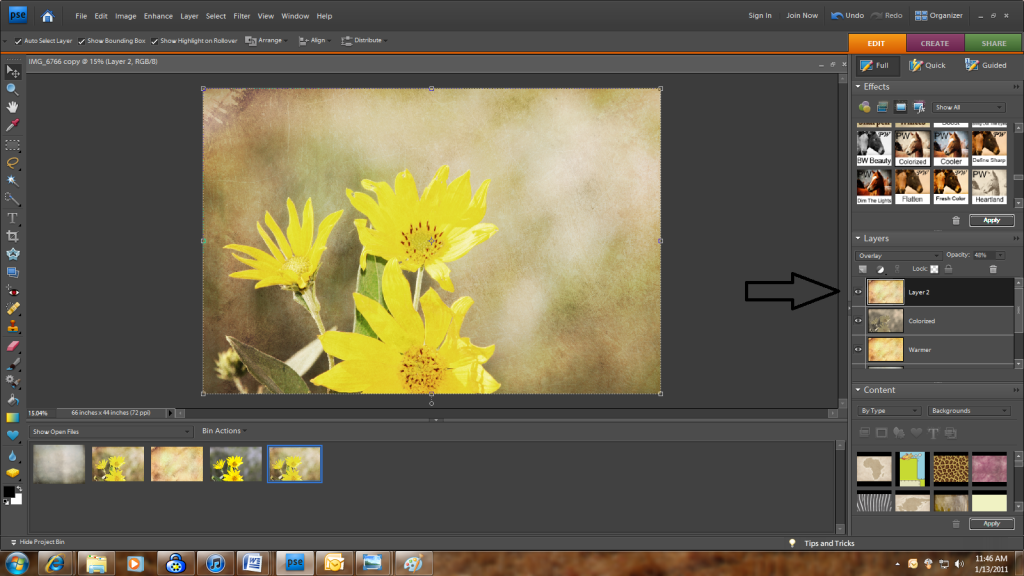
I decided to add a little depth by dragging the 2nd layer (my Shadowhouse texture) to the top in my layer's palette.
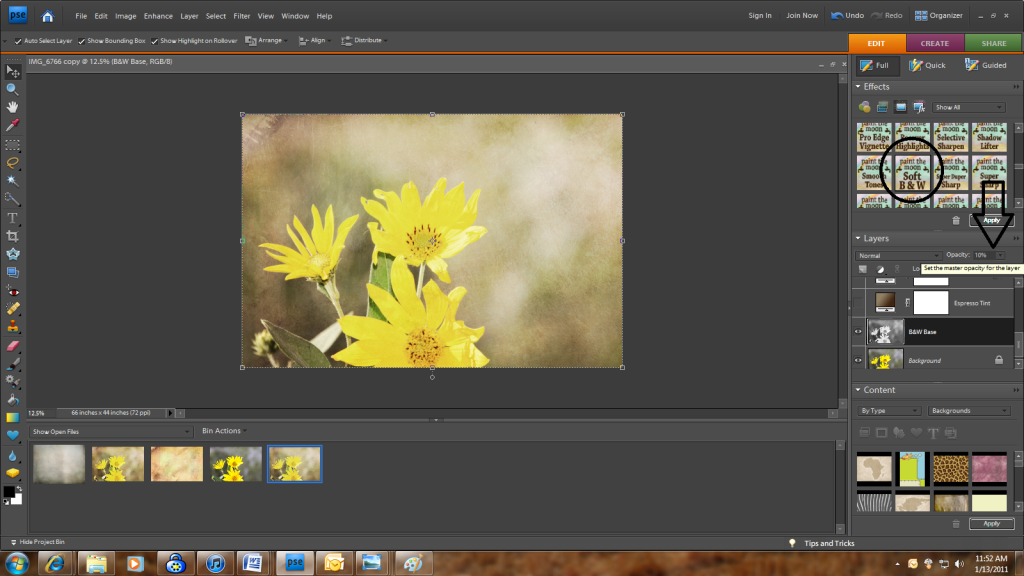
Then I added a Paint the Moon texture called soft b&w. This step is totally unnecessary and it is only to prove that there is no going wrong in photoshop.
I decreased the opacity to 35% and decided to call it a day.
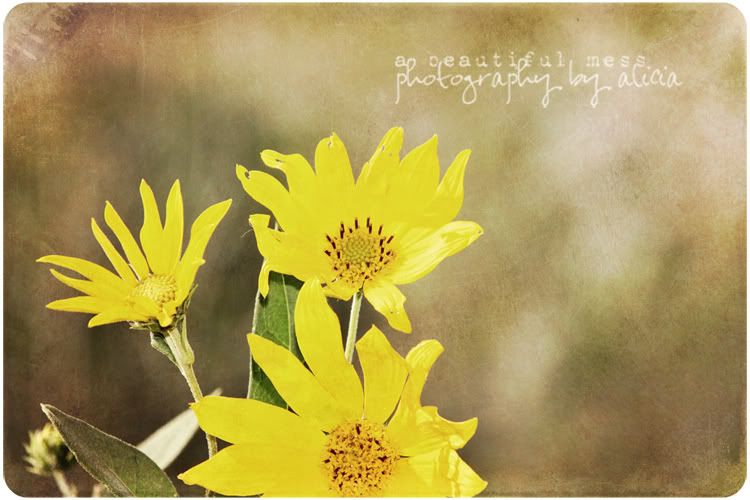
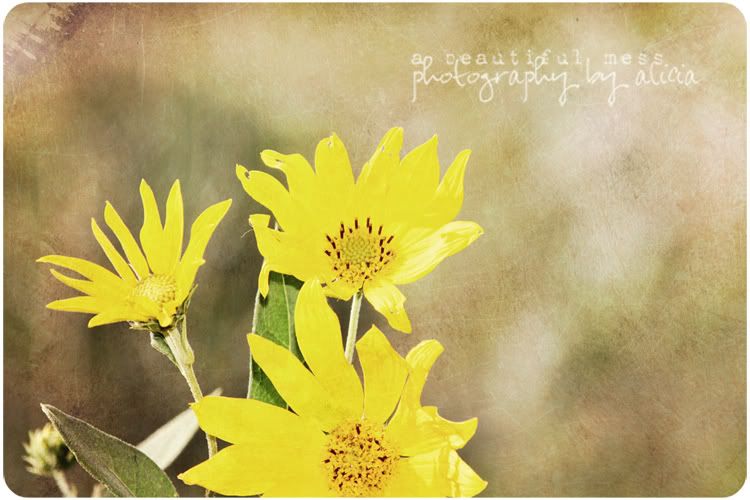
My end photo turned out like this.
But whether you choose
Photo 1
Photo 3
or Photo 4
...it really doesn't matter. There is no right or wrong. You can add any combination of textures and actions. You can even change the opacity or placement of a layer to alter the effects. But by using the layers to transform your photo the possibilities are endless. And the more you tweak them the more natural it will become, for both you and your photos.
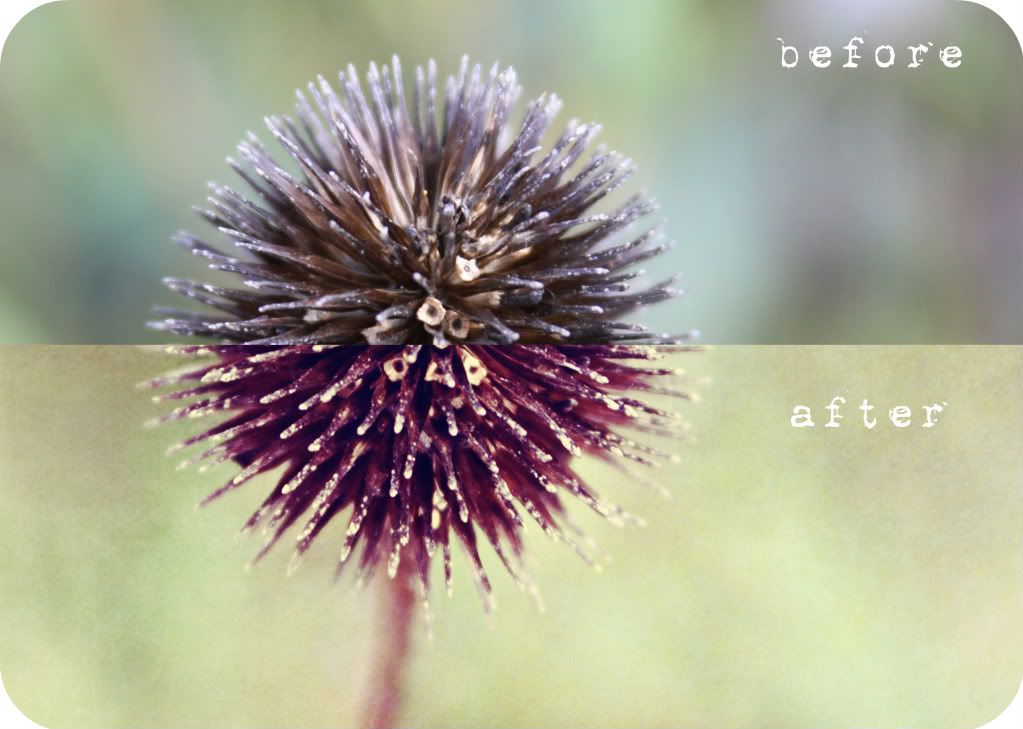
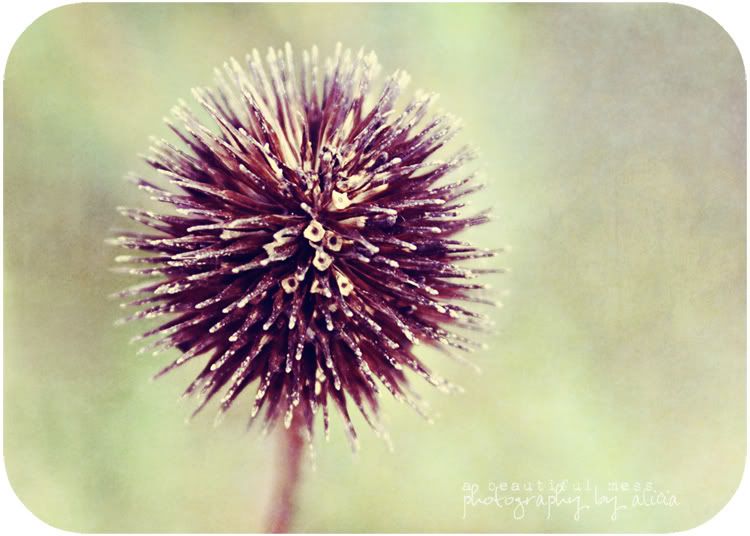
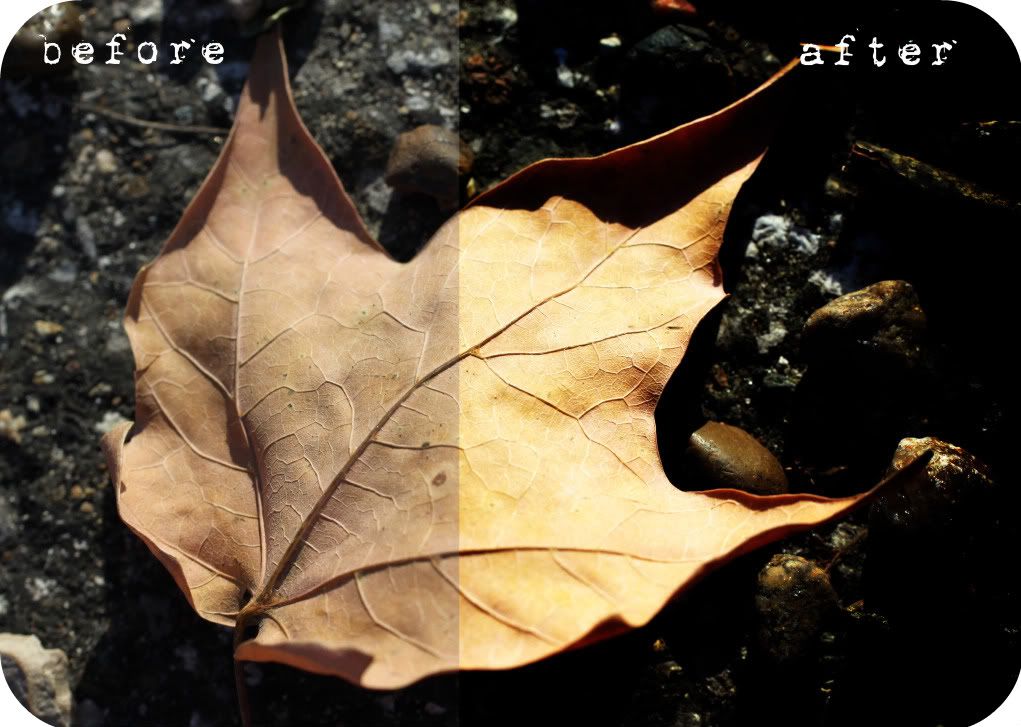
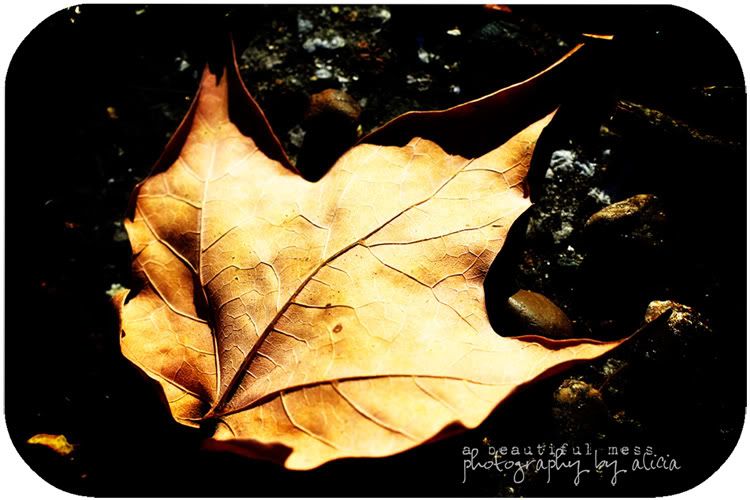
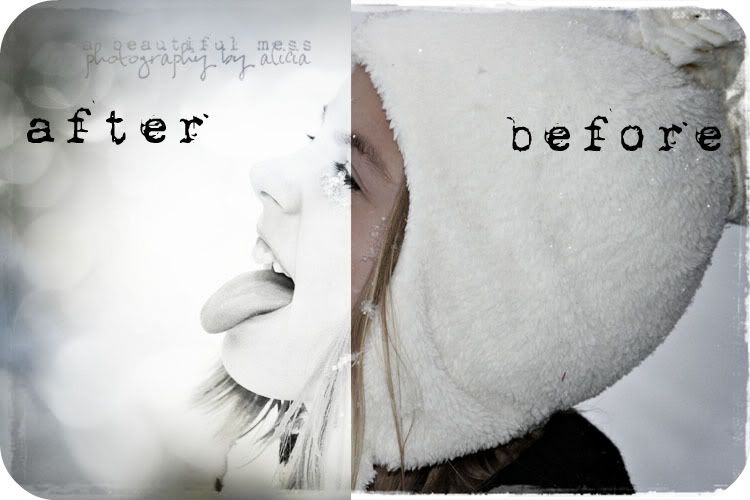
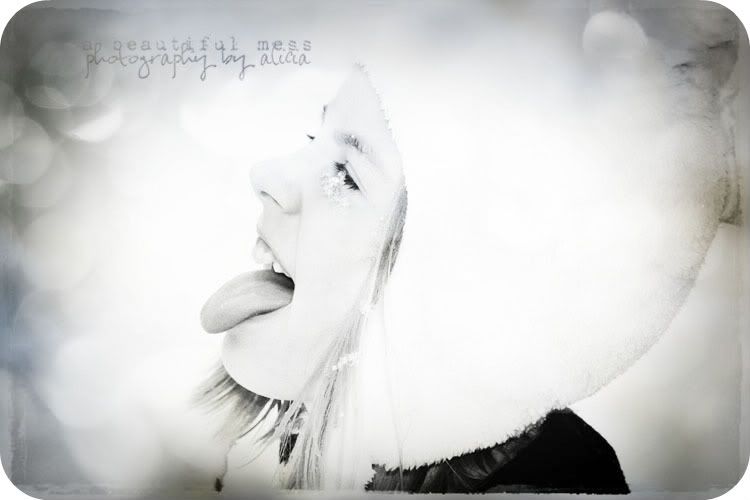
Just for fun I decided to leave you with a few other examples of how actions and textures combined can really jazz up a photo.
If you are still with me, congratulations. If you are more advanced with photoshop you may have skimmed the tutorial, so let me summarize the good stuff you may have missed.
Actions
My favorite actions are those of Pioneer Woman. She has a free set that you can download here.
Coffeeshop also offers fabulous free textures. Her perfect portrait is a must have. She also has some textures available.
Nelly Nero also has some great actions as well.
The hardest part about actions is getting them downloaded, but once you get them in your effects palette they are a piece of cake and will certainly make your life easier and your photos fabulous.
The texas chicks put together a comprehensive video that details step by step instructions for how to download the actions to your computer.
Textures
There are numerous places that now offer free textures.
Kim Klassen offers free textures on Fridays if you sign up on her email list. She also offers some free classes.
Shadowhouse has an amazing stash of free textures. He even has a new blog called my 2econd skin so you can download his textures by sets.
I do not profess to be any kind of expert on the subject matter. As you can see most of photo editing is trial and error. And the best part is it allows for some creative freedom. The more you practice the better your photos will become.
Thank you for stopping by. I hope you've enjoyed my first ever screen shot tutorial. By the way, I found a great tutorial on how to capture screen shots for PCs here.
That is all for now.
great tutorial, thanks for sharing!
ReplyDeleteLish, you have found your calling! Not only am I inspired to take more photos, I feel confident that I can follow your tutorial and create something special. Way to go!
ReplyDeleteAs ever Alicia - this post rocks! I have LOVED all your photography tips over the past few months and have even graduated to using Photoshop and Actions ... and that's ALL because of you (I was a Picasa-only gal before that!)
ReplyDeleteIt basically helped me create an amazing Photobook of collages for Christmas (part Picasa, part Photoshop) and I plan to do more, more more in the future.
Can't wait to get home and try out your tutorial.
Have a fab weekend xx Meg
What a great tutorial! Thanks for sharing your info.
ReplyDeleteThis is great Alicia and no lie I'm literally writing the exact same tutorial.
ReplyDeleteI have to say- im HIGHLY impressed with those before and after pics you have! nice work! thanks for the tutorial. Im not good with actions.
ReplyDeleteThese are great! I love this tutorial. Great job!
ReplyDeleteOmg!
ReplyDeleteCan I marry you after this tutorial please?
THANK YOU!!
I'm taking one of Kim Klassens classes right now and I'm just learning about photoshop so this has been amazing! Thank you!
Also, I have one more question if you don't mind?
Have you ever editing in Elements and then printed your work? I was just wondering when you save your jpeg image for print, is there a general size that works best for print? I have PSE9 and am hoping to print but am a little scared because I have no idea if they will turn out!
Love this tutorial! Definitely have to bookmark this post for future reference!
ReplyDeleteYou did an amazing job with this, as I knew you would. Now here's hoping that I'll be able to follow your awesome tips and create awesome texturized photos myself. Wish me luck!
ReplyDeleteAwesome! You know I'm trying to learn more about Photoshop so this is a godsend!
ReplyDeletePLUS: When I use words like "actions", my husband looks at me in surprise. I play it cool, like I know what I'm talking about ;-) So the more lingo I can through around, the better! haha
Or, "throw" around. Sigh...
ReplyDeleteI LOVE actions. Coffee Shop is by far my favorite. I Heart Faces has a great list of some as well.
ReplyDeleteThis is awesome! Thanks for sharing all of this wonderful info!
ReplyDeleteFYI: Came back to Stumble this post! It really is a great tutorial for us texture-challenged folks. ;)
ReplyDeleteHaha! My favorite part of this post is when you said "If you're still with me." This is way too advanced for me, I can't seem to wrap my head around even the most basic aspects of Photoshop. I need a class, like in a classroom, with an instructor, who is an actual person, standing in front of me!Looks like a great tutorial though.
ReplyDeleteWow, thank you for sharing, taking the time to show us each step.
ReplyDeleteAlyzabeth's Mommy
What a an excellent tutorial! I visit those same sites and use their actions also. They set the bar pretty high! I'm following you now and excited about what I could learn-I'm just getting into making my own textures-they're freebies for now ;0)
ReplyDeletehttp://livinglifephotographically.blogspot.com/p/my-texture-sets.html
OK, totally LOVING your blog...I'm just "wandering" around everywhere - LOL! So many great tutorials here! How did I miss this before? You know...life is so crazy I don't always have time to stop by everyone's blog that leaves a comment...sometimes I can only respond by email; that must be what happened. I'm so GLAD I popped over, this is incredible! You are one talented gal!
ReplyDelete